

How to Get Google Assistant on any Android 7.0 Device (Root)

Google announced its make new phonation assistant merely dubbed Google Assistant at the I/O briefing before this year and while it was integrated to Allo, it has now arrived in full fledged form with the Pixel smartphones. Equally of now, the Google Assistant is only bachelor on the Google Pixel, and Pixel 40 phones (unless you want to open a chat app every fourth dimension you lot want to use it). Still, if you just can't wait for the AI powered smart assistant to get bachelor on your device, you tin employ an easy pull a fast one on to become information technology working on whatever rooted Android Nougat device. All it requires is making two very tiny edits to your build.prop file.
build.prop: What is it?
The build.prop file is a system file that stores a plethora of information about your device. As such, the file is non editable, unless you are rooted, and even then, information technology is recommended not to edit it unless you know what you're doing.
The build.prop file is zilch but a text file that holds some really important information regarding your device. Editing the build.prop file can permit you to change a lot of settings on your phone, as long as yous edit it correctly, and relieve it properly.
The file resides in the "/system" directory which volition only be attainable to you if you're on a rooted device. Now that you have some thought about the build.prop file, let'south get down to editing it.
Editing the build.prop File
To edit the build.prop file, you will require a file managing director that allows root access. 1 such explorer is the ES File Explorer (free), which is what nosotros're using in this article. You can choose whatever file manager y'all like, as long every bit it supports root browsing. With that out of the style, let's get started with editing the build.prop file. To do this, simply follow the steps beneath:
1. Launch ES File Explorer. From the left edge of the screen, swipe right to reveal the menu. Hither, toggle the switch that reads "Root Explorer".
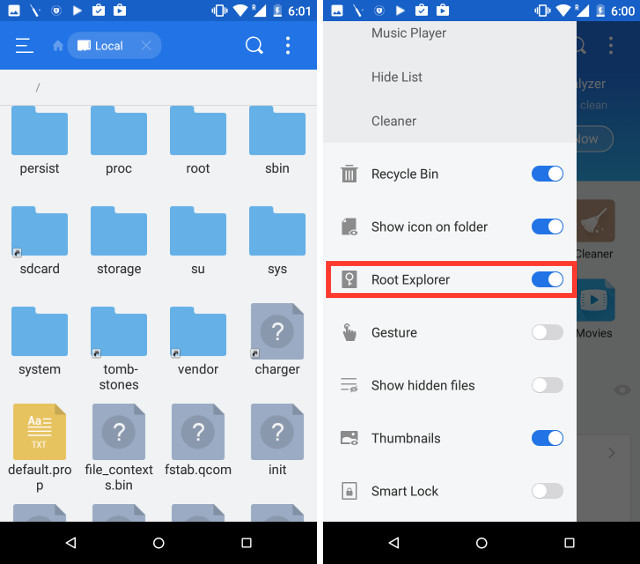
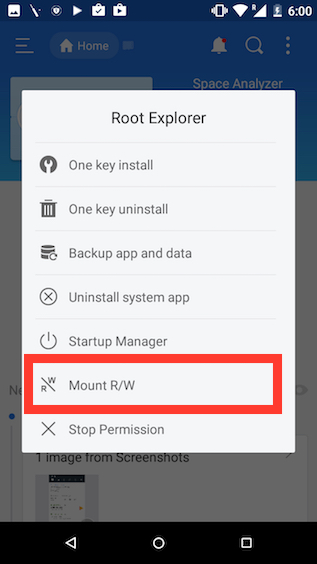
2. Tap on "Root Explorer", and then on "Mount R/Westward". This will allow you to mount your filesystem with Read/Write permissions.
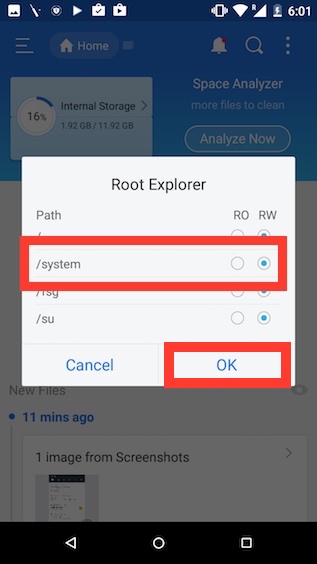
three. Here, mount "/system" as RW, by tapping on the radio button under the RW column. Simply so you know, "RO" stands for Read Merely, and "RW" stands for Read and Write. Once done, tap on "OK".
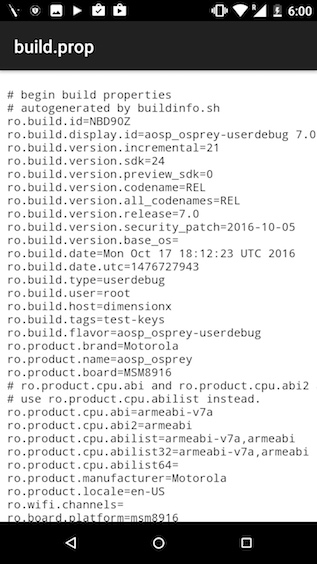
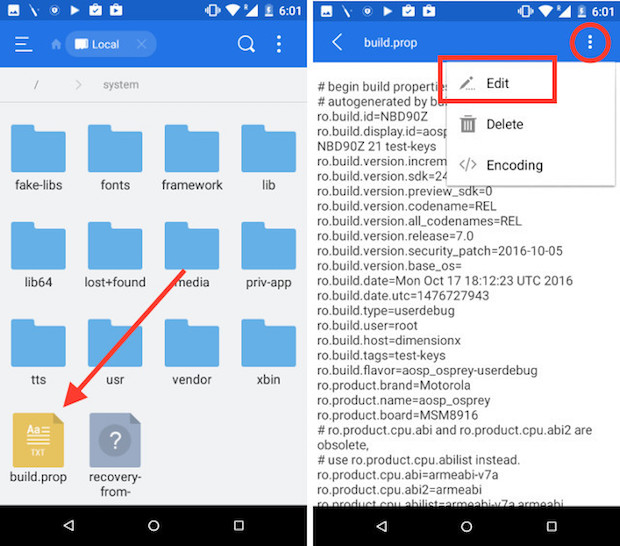
4. Navigate to /system, and open build.prop. Then, tap on the three dot menu push button, and tap on Edit.
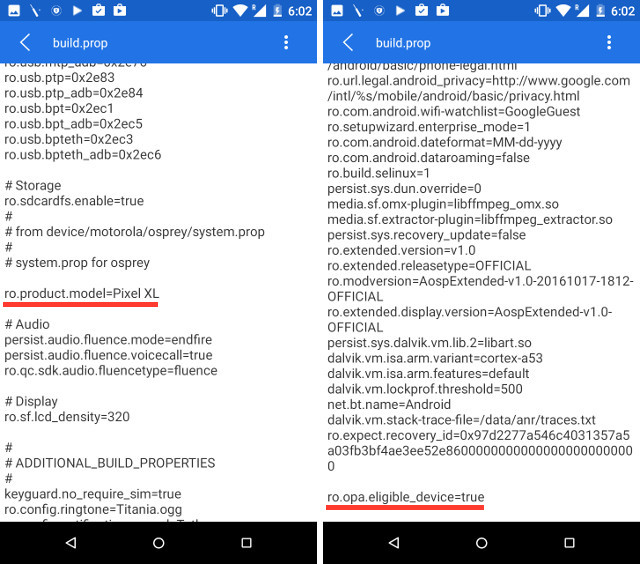
five. Look for a line that reads "ro.product.model=your_device_name". By default this would have the name of your smartphone. Only alter information technology to "ro.product.model=Pixel XL". At present, ringlet downward to the bottom of the build.prop file, and add together a line that reads "ro.opa.eligible_device=true".
Those were all the edits that yous needed to make to the build.prop file. Once you accept done all that, simply reboot your device.
Getting Google Assistant to Work
And so, one time y'all have rebooted your device, yous're probably thinking that'due south it. Merely it'due south not, I'm sad. There is nonetheless a petty more to do before you can actually start using Google Assistant. As of at present, if you long printing the domicile button, information technology will still launch Google Now on Tap. And so, how exercise we get from that to the mighty Google Assistant? Well, we'll merely demand to clear the data and cache for the Google App, and that's it. Follow the steps below:
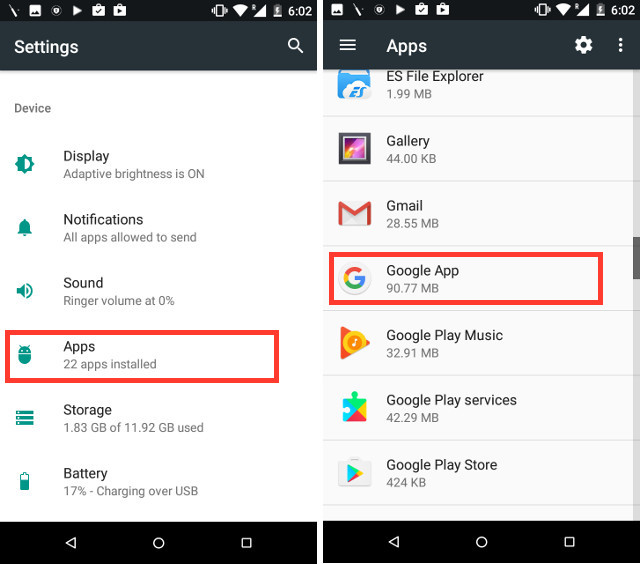
1. On your telephone, go to Settings -> Apps. Here, scroll downwards, and tap on the "Google" App.
2. Tap on Storage, so on "Manage Space".
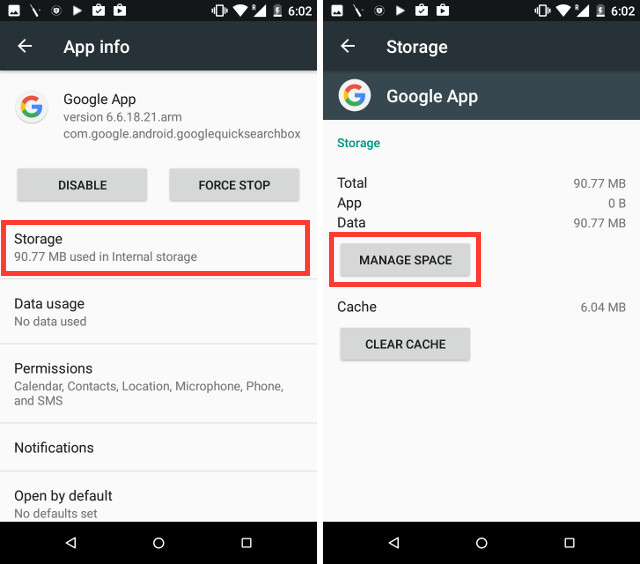
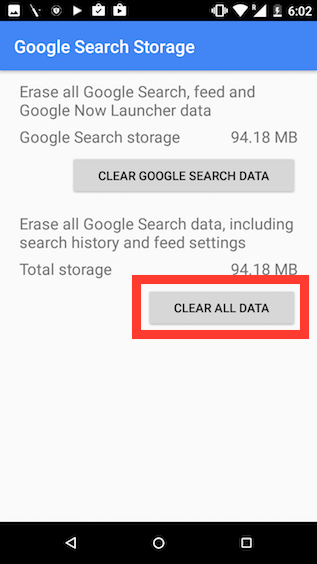
three. Tap on "Clear All Data". This should clear all data and cache for the Google App.
Once you lot're done, simplylong press on the habitation button, and you will see the Google Banana welcome screen. You can set it upwardly, and there you become!

You have Google Assistant running on your not-Pixel Android device! Yous can now offset using the Banana just as one would normally employ it on a Pixel or Pixel XL device.
Meet Likewise: How to Run Same Apps in Separate Screen on Android Nougat (No Root)
Utilize Google Banana on your Android Device
Now that you know how yous can become Google Assistant on your Android device, running Android vii.0, you should definitely play around with Google Assistant and figure out some of the absurd things it does. It can play games, notice data on the web, and do a lot more for you. To become started, yous can just ask Google "What can you do?", and it will tell you some things that you lot tin ask it.
If you lot have any issues with getting Google Assistant working on your Android device, experience free to drop us a line in the comments section below, along with any other methods to get the Assistant on an Android device.

Source: https://beebom.com/how-get-google-assistant-android-nougat-device/
Posted by: vinsonareimis.blogspot.com
0 Response to "How to Get Google Assistant on any Android 7.0 Device (Root)"
Post a Comment